Modelling a Danish MY 1144
 I remember seeing this locomotive as a kid years ago in the Marklin and Fleischmann catalogs, and always being taken by its good looks.
Unfortunately, Marklin doesn't make this locomotive in Z scale, nor do they make any other Danish locomotives.
I remember seeing this locomotive as a kid years ago in the Marklin and Fleischmann catalogs, and always being taken by its good looks.
Unfortunately, Marklin doesn't make this locomotive in Z scale, nor do they make any other Danish locomotives.
Update: as of 2005, Marklin now produces a Belgian Class 54, the 88630, which is similar to the MY series.
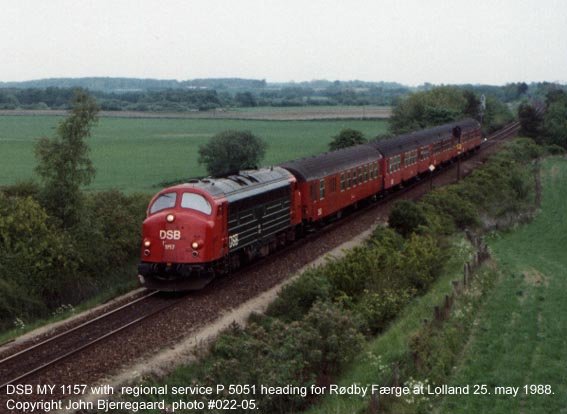
The visual similarity to the EMD F7 is obvious, but more than coincidence. The DSB (Danish State Railroad) began to commission diesels from EMD in the '50s, resulting in several series, including the MX and MY series (the MY 11xx series being my favorite). It was originally a multi-purpose locomotive, but today (still in use) pulls mostly freight. Apparently, the MY 1101 is used as an active museum locomotive.
Recently, I came across a couple of Micro-Trains F7 shells, and one foggy evening, it occurred to me what an easy and fun project it would be to transform two of them into an MY1100. The following are pictures I took during the process. The final result is certainly not prototypically perfect, but I'm happy with it.
|
Extra! Extra! This article appeared in the November/December 2000 issue of Ztrack Magazine (volume 6, Number 6), page 10. See this issue for more information on the MY 1100 and hints for obtaining Micro-Trains shells! |
Feel free to write me if you have any additions or corrections to this page.
Click on any photo to see more detail.
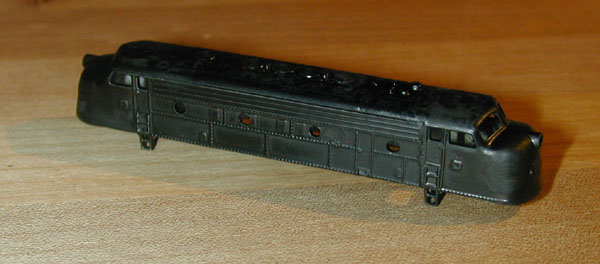
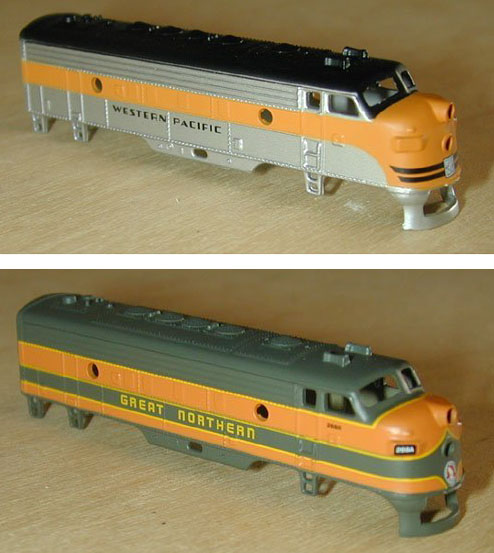 Here's what I started with.
I'm not sure where new F7 shells can be acquired, though - perhaps Micro-Trains has them available.
Here's what I started with.
I'm not sure where new F7 shells can be acquired, though - perhaps Micro-Trains has them available.
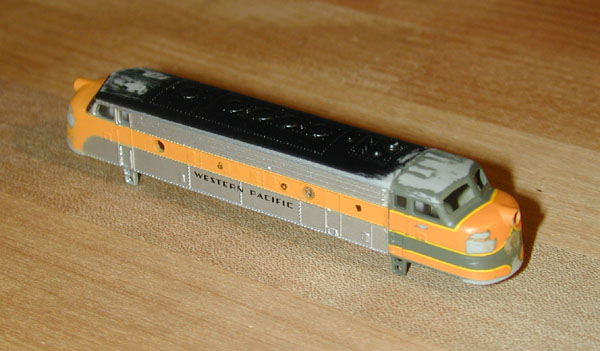 I cut the rear off one shell, and the nose and cab off another; the photo shows exactly what was used.
Both pieces were measured to fit a Marklin 8854 chassis, which conveniently shares the dimensions of the prototype almost exactly; I also wanted the ladders and other major details to be in the right places.
The two pieces were then glued together with epoxy, and a fillet was included inside for extra strength.
I also used epoxy to fill the unwanted holes by covering the inside with masking tape, and then grinding it down after it had dried.
I cut the rear off one shell, and the nose and cab off another; the photo shows exactly what was used.
Both pieces were measured to fit a Marklin 8854 chassis, which conveniently shares the dimensions of the prototype almost exactly; I also wanted the ladders and other major details to be in the right places.
The two pieces were then glued together with epoxy, and a fillet was included inside for extra strength.
I also used epoxy to fill the unwanted holes by covering the inside with masking tape, and then grinding it down after it had dried.
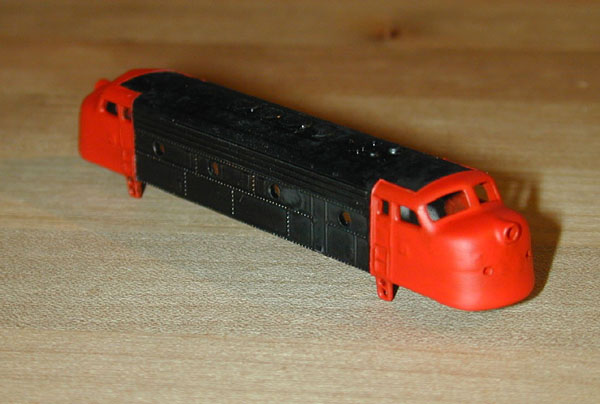
Finally, I used a Dremel to remove all unwanted features, such as the number boards and horns.
The pilots were also removed (albeit not at first) to improve the appearance and to make room for the couplers.
 I drilled new portals on the sides and additional headlights on both ends, and then massaged it here and there with the Dremel and an Xacto.
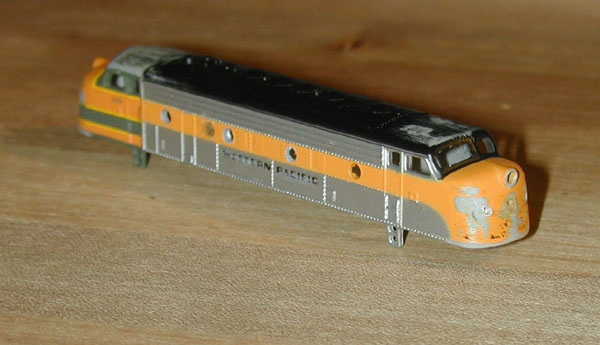
 The entire shell was then airbrushed black.
 Areas to remain black were masked with Duratrax window mask, and then the shell was airbrushed red.
 The mask removed...
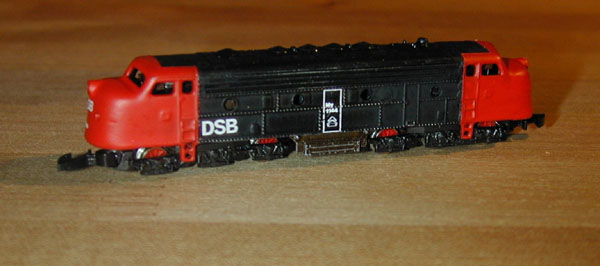 Detailing was designed in Photoshop and printed on water-slip decals, using white ink and an Alps MD-5000 Micro-Dry printer.
Application was a piece of cake!
I decided on a cleaner look, so the fine printing was left off.
Detailing was designed in Photoshop and printed on water-slip decals, using white ink and an Alps MD-5000 Micro-Dry printer.
Application was a piece of cake!
I decided on a cleaner look, so the fine printing was left off.
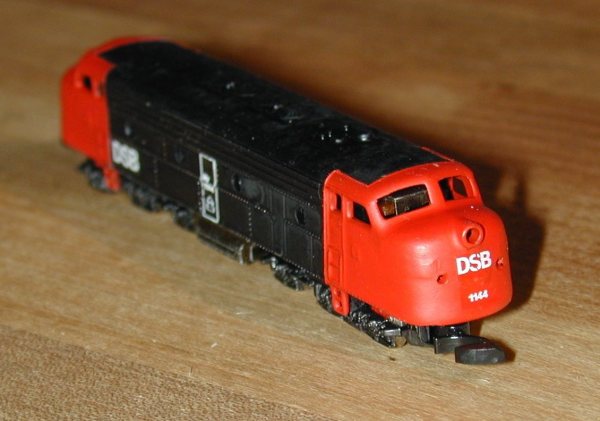 I ground four small dimples on the inside of the shell so that it snapped comfortably on the Marklin 8854 chassis.
Clear windows will be attached soon; the prototype appears to have silver-reflective windows, which should hide the chassis well.
Compromises I made with this model: windshield shape is not quite right, headlights aren't all the same size, no room for pilot, details on roof aren't complete.
Feel free to write me if you have any additions or corrections to this page.
The first photo was taken by John Bjerregaard; for more photos and information regarding the MY 1100 series, see the Rail-O-Rama Photo Gallery.
Return Home | Search | Contact Me
Copyright © 2000-2010 D. A. Karp. All rights reserved.